
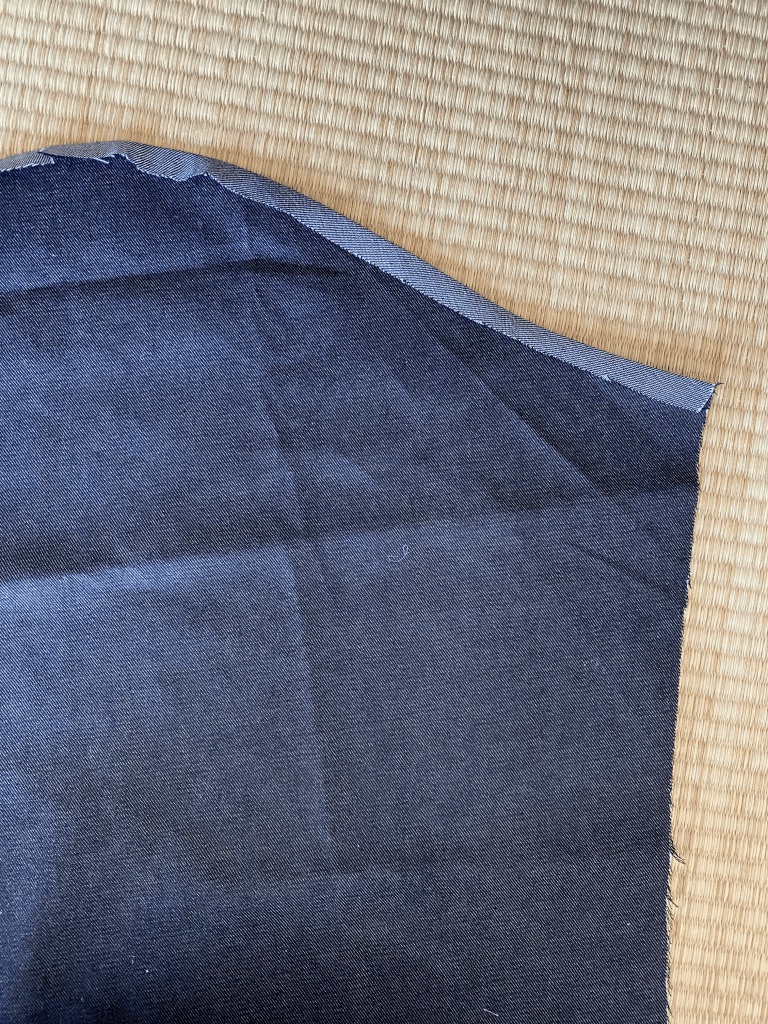
Setting in the sleeves of a shirt is possibly my least favorite sewing task. My problem is not so much the actual setting in, with easing and all that jazz, but rather the felling of the seam: the seam is too curved for the magical felling foot, and very conspicuous. In Neapolitan shirt making it is often stitched by hand, but…yeah. Nope. In addition, felling as it’s described in commercial patterns, with trimming of seams and repeated seaming (all in the round, mind you!), is also insanity not to mention a waste of my time, IMHO.
So, since I’m making lots of shirts currently, I searched high and low for a method to insert sleeves in a more or less painless way. And I found it, courtesy of to DPC no less: a simple procedure to sew the sleeves to the body of a shirt using 1 (yes, ONE) pin. However, I found the explanation offered by Page Coffin a bit laborious (not to mention in Imperial), so I naturally developed my own take, which has so far served me well. Because sharing is caring, I’m going to attempt to explain you how.
In metric.
No apologies.
Step 1
First of all, in our pattern pieces we need to add to the seaming allowance (SA from now on) of the sleeves. In my case, the SA at the sleeve is 1.2 cm, and I added 1 cm to the SA of the sleeve piece only. So now, what I did was to fold over this extra 1 cm on the sleeve, and also marked the actual stitching line, 1 cm from the edge of the body piece. For now, forget there is a fold there, treat it like an edge.
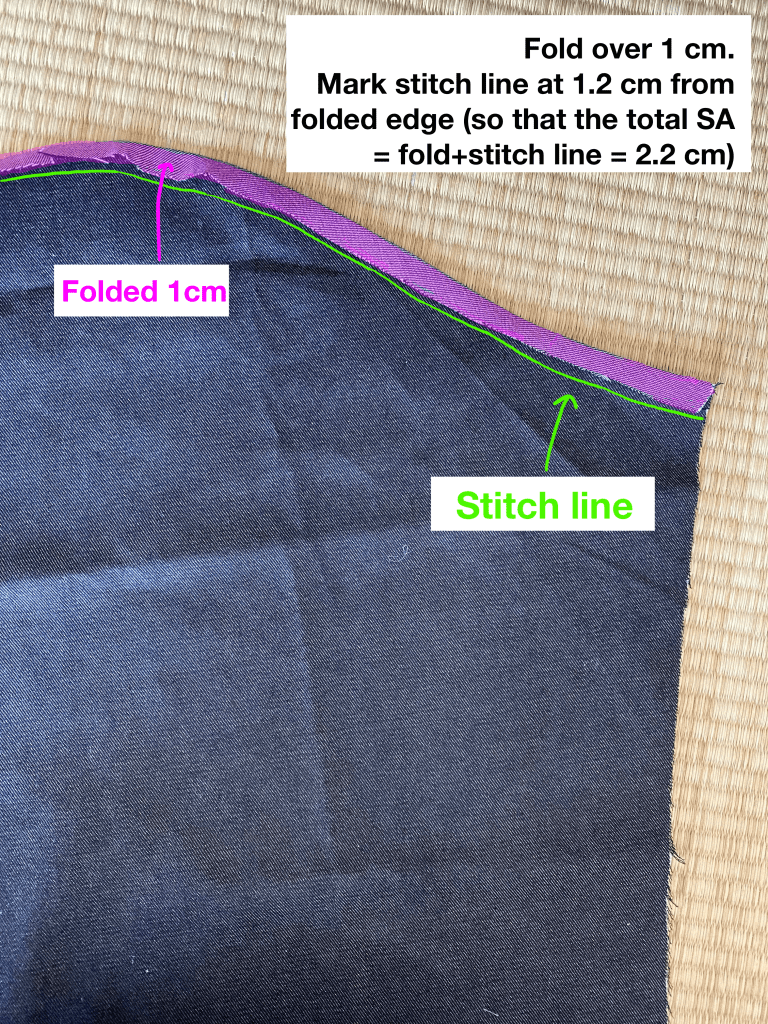
Please remember that:
- magenta = 1 cm fold on the sleeve
- green = sleeve stitch line
- cyan = body stitch line
Step 2
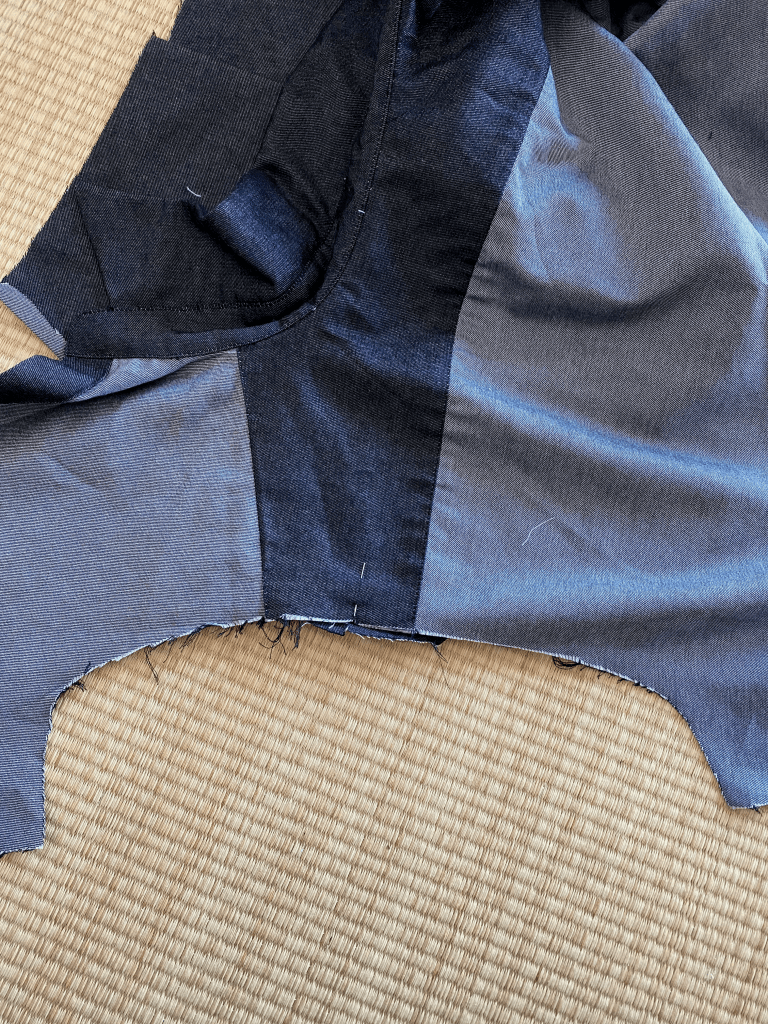
Place the sleeve under the body, right sides together. I previously marked a notch on the apex of the sleeve, and a corresponding one the body – in my case located in the middle of the shirt yoke. These notches correspond to the mid point of the sleeve/armhole seam lines. Insert your one precious pin here: this will be your center of rotation.


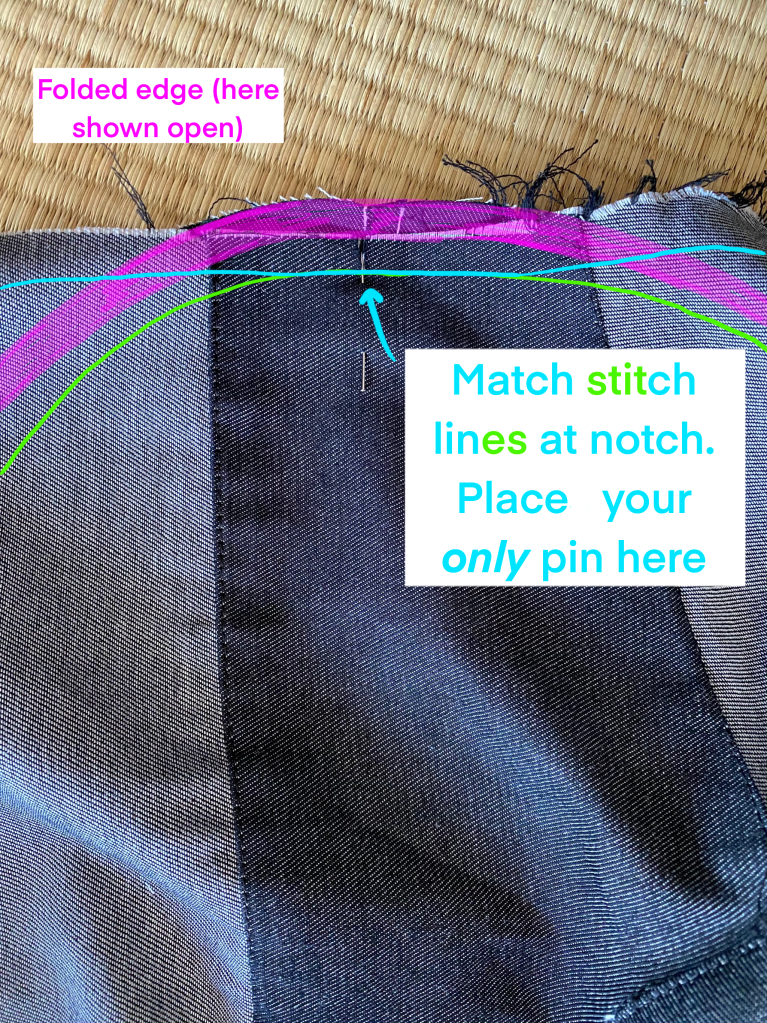
Keep in mind the following: for this method to work, the armscye SA and the sleeve SA are actually a different width:
- sleeve SA = 1.2 cm
- armscye (on body) SA = 1 cm
This means that, once I matched my SA markings, the folded edge on the sleeve will actually stick out of about 2 mm (in the picture above it appears to be more because it is actually unfolded).
Step 3
Stitch from the pin to one edge of the body. Now, crucially, you will have to keep in mind two things: not catching the folded edge (which is unlikely to happen if you have pressed everything according to measurements), and rotating the sleeve as you go, to make the two stitch lines straight, and thfolded edge parallel to the stitch linee. Use the one pin as a bearing.


Step 4
Repeat as above on the other side. I highly recommend chalking the lines so you don’t need to rely on the stitching guides on your machine’s throat plate.


Step 5
You are almost done!
What really amazes me about this method is that the curve of the armscye is actually preserved, which I was originally very skeptical about. After all, curves and as a consequence arm mobility is among the reason setting in is better than inserting in the flat in certain cases.
At this point, you want to press the folded edge lightly to make sure the fold is precise and follows the outline of of the armscye, and also press on the outside, to really flatten it well. You now have two options to finish this seam: you can flip your work and sew the folded edge down from the right side, which is my preferred method for precision, as I can control exactly how the stitch line will look on the outside.


Alternatively, you can also edgestitch from the inside.


And that’s it! Amazing, isn’t it? Now you can go ahead and close the side seams, insert cuff, etc. Since adopting this method, I’ve cut my sewing time to almost half. Yes, half. This is how fast this method is.
If you have ideas or comments, please write let me know in the comments or DM me on Instagram. If you enjoy my content please consider supporting my work here.

Hi Emilia,
Attaching a shirt sleeve with 1 pin its really wonderful trick . We can easily manage it at any place .specially when we wear dress shirt. Thanks!
LikeLike
Ooooh, I’ll give this a try! I have inserted sleeves without pins on muslins using what I can only describe as a magic trick I saw Janet Pray do, which consisted of putting the curved sleeve part close to the feed dogs (as you have done in your tutorial) and using your left hand to manouver the excess fabric, putting it between the two lairs. No pins! An act of faith, if you ask me, but it works when there is not too much easing. I was so taken aback that I was too petrified to try it on the actual garment!!! I told myself that in the interest of Science I would set in the sleeve in the traditional way and compare results. I honestly couldn’t tell the difference.
I’ve just discovered your blog and I’m thrilled! Thanks!
LikeLike