
I’ve been asked several times what my secret for a crips sleeve placket, as this particular part of shirt making is often badly explained and ends up dissuading many people from making shirts altogether. For this reason today I’m sharing with you my own method. I confess it’s been a lot of trial and error over the years but after having tried 5 different methods I’ve devised one which I think is both easy and neat. So here we go.
First, you need to decide the shape of your placket. I like the pointy style, you may like the square style better: there is no right or wrong here, just personal preference. The measurements described in the figure below are the ones I use for my own shirts, which are a good mid size. However, feel free to size the placket as you want, as this is just an example.

Having cut the placket, we now have to sew it on the sleeve. Each sleeve has a front side and a back side. In this method, we want to flip the sleeve so the wrong side is facing up, and so is the wrong side of the placket. We then want to position the placket where the cut line is on the sleeve pattern piece, with the “tower” side towards the front of the sleeve, and conversely the shorter side towards the back of the sleeve.
Don’t forget to draw the little rectangle in the middle of the placket: that is where the first stitch and cut lines are going to be.

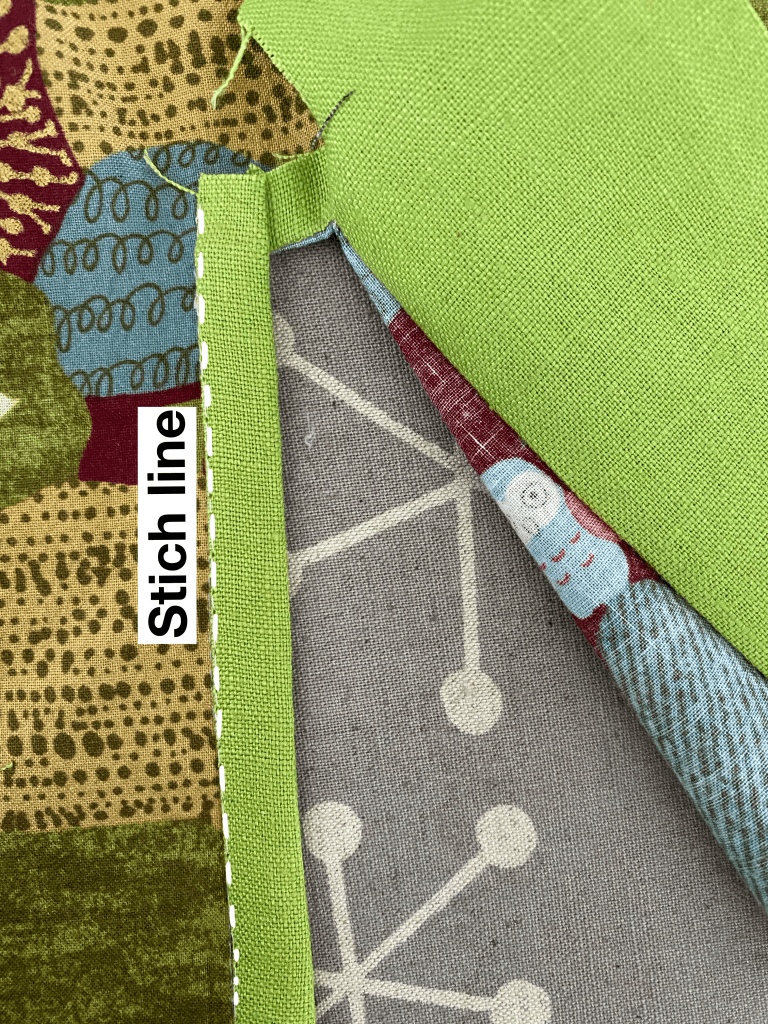
At this point we want to start stitching: follow the stitch line you marked previously (here represented by a white line). Once you have sewn the rectangle, procede by cutting the opening, stopping about 1 cm prior to the top of the rectangle. At this point, we want to cut a little triangle, towards the corners of the rectangle, and coming as close as possible to the corners – without snipping them.

Like so
At this point, start pressing the seam allowances down with your iron. I do recommend an iron and not just your fingers because precision is key here.
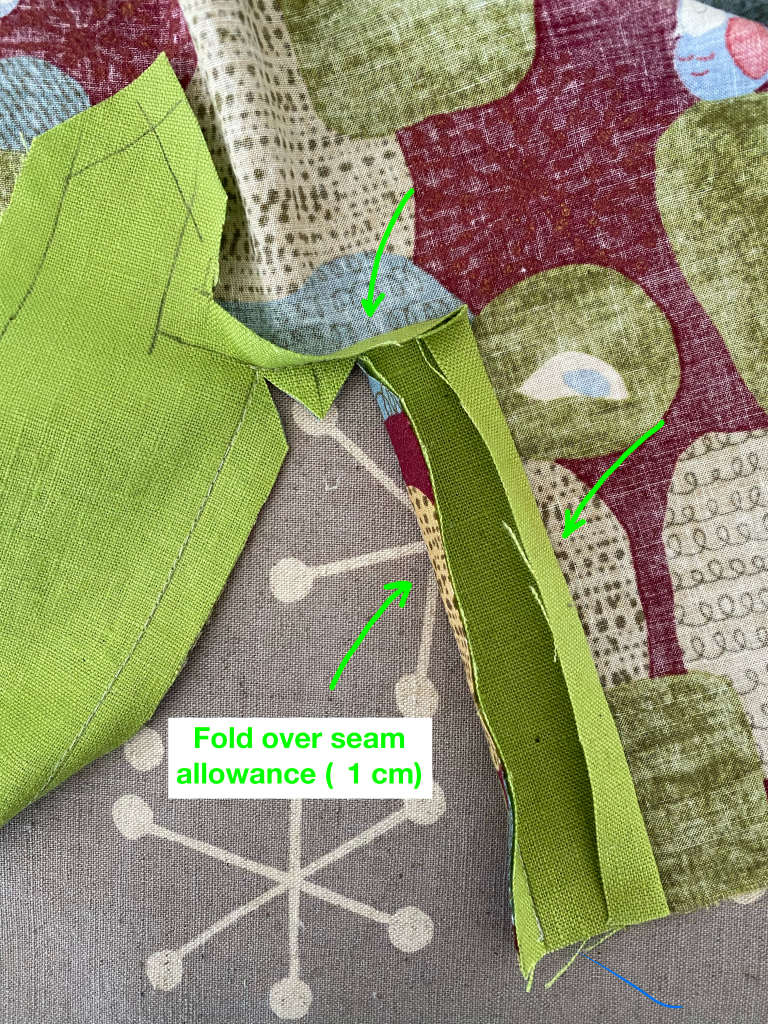
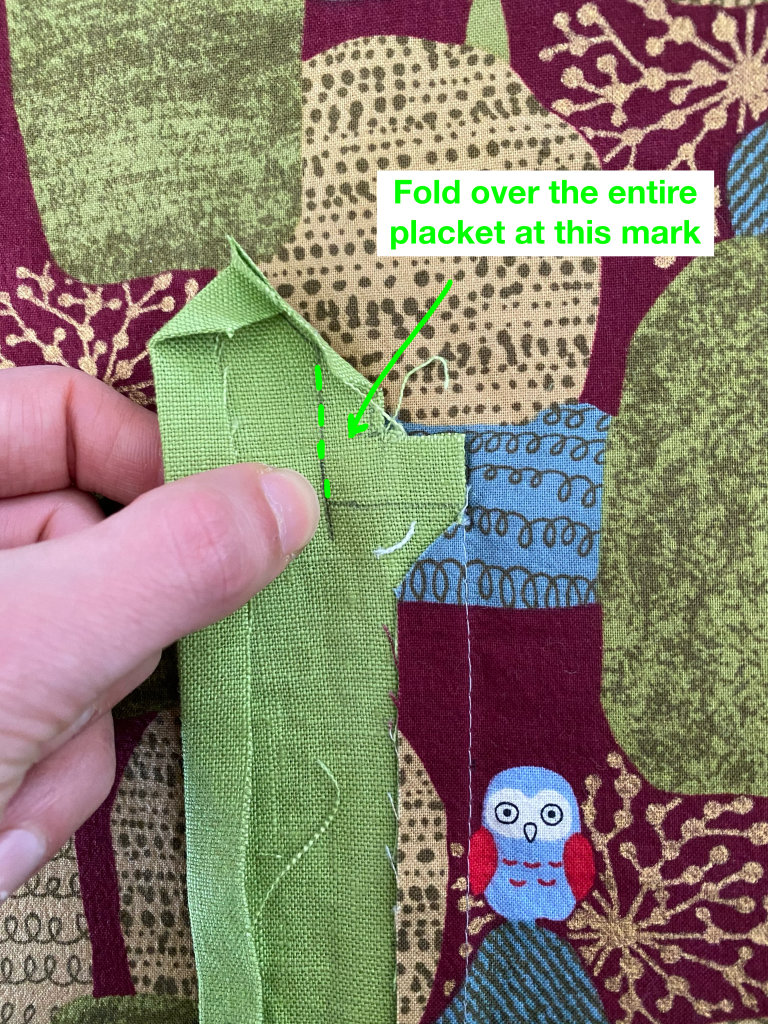
After pressing, you are ready to flip the placket to the right side.

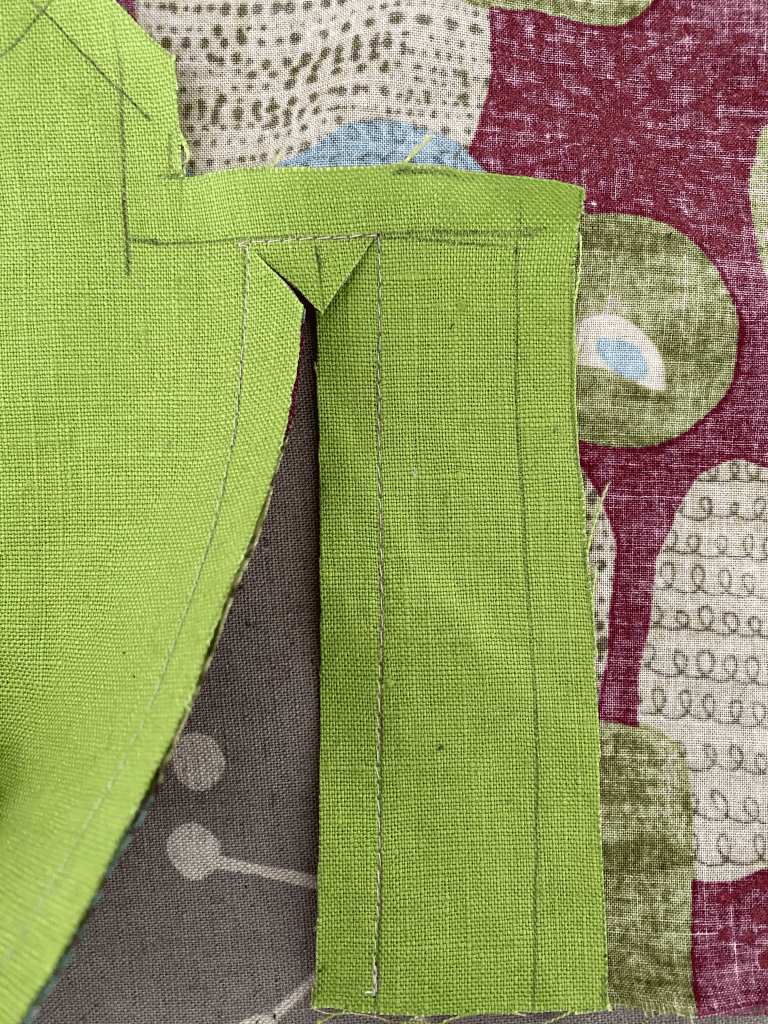
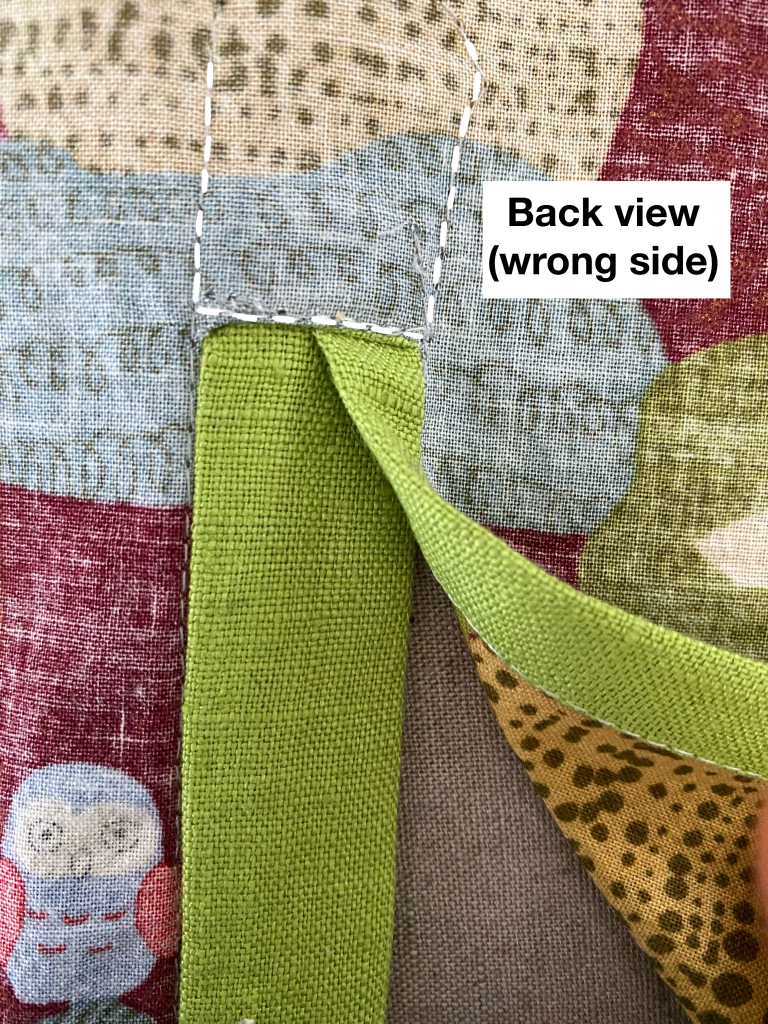
Now we fold the small part of the placket (the non tower one) in half longitudinally and sew it down, like so.
Great! We are almost there.
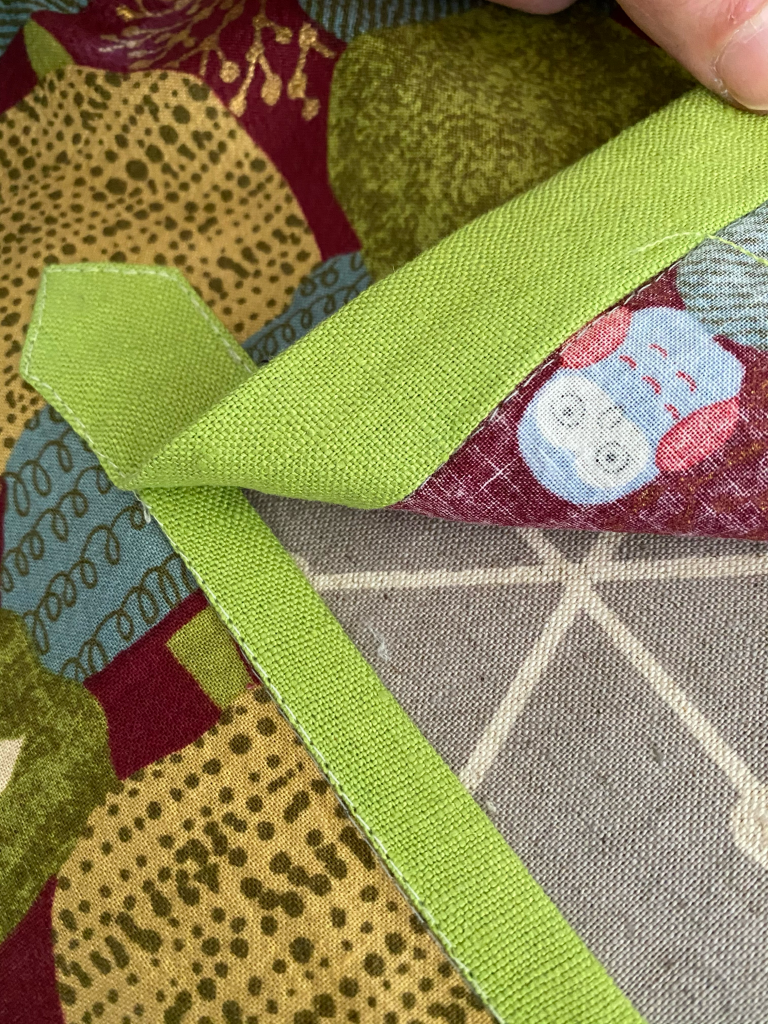
At this point we want to bring out attention to the tower section. Also in this case, we want to press the seam allowances down, being careful to make the tip of the tower symmetrical.
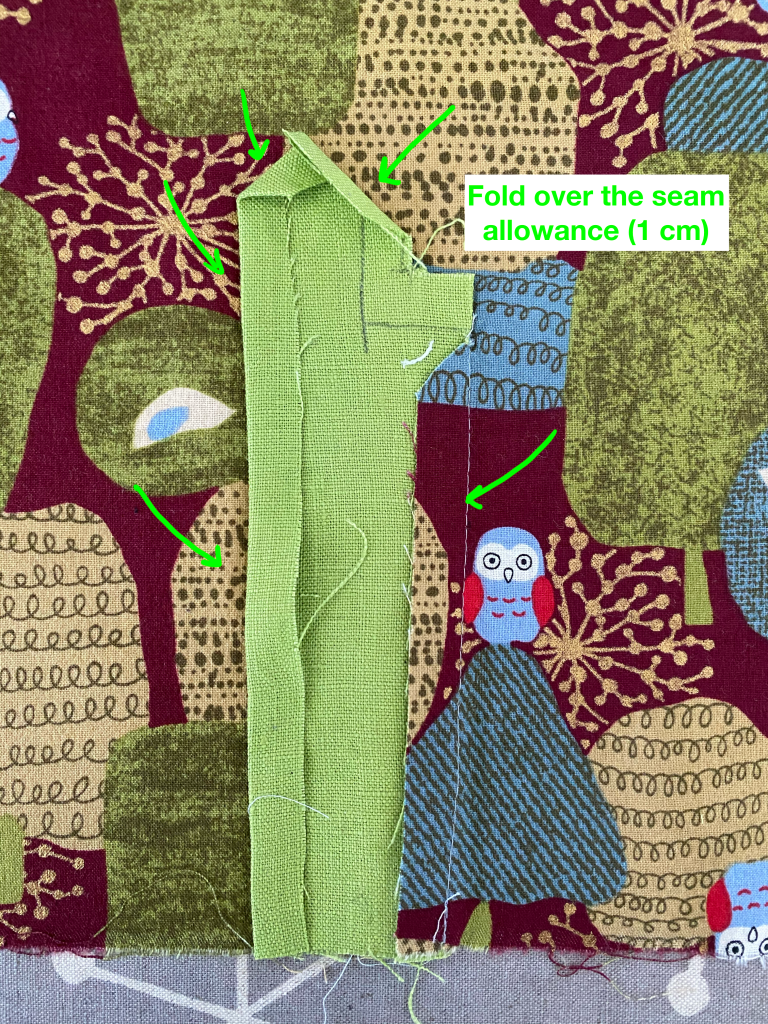
We are now ready to stitch the final section of the placket down, in this order.


Until next time, cheers.
E.

This is magic!!! I never realized how similar it is to sewing a welt pocket (the 1st half of it), but actually easier. Eeep I’m excited to try a placket now!
LikeLike
This is sooooo helpful. I’ve been putting off my post-toile kalle shirt because I was so flummoxed by the placket. That’s a collar placket but the concept is the same.
LikeLike
Oh yes, the principles are the same! I don’t get why pattern designers over-complicate the instructions for this part of the construction.
LikeLike