Canvas is a type of underlining used to shape and give structure to tailored garments, especially coats (aka jackets) and overcoats. Far from being a standardized practice, it takes many forms: from the multilayered full canvas used in Savile Row, to the its absence in Neapolitan tailoring, there’s really no right or wrong way to do (or not do) canvassing. As I’ve said ad nauseam, there is no “”right” or “wrong” in tailoring, it’s all up to you and the effect you want to achieve.
Today I want to break down for you the different types of canvassing which are most commonly found, both in tailor shops and in RTW. This is by no means and exhaustive guide, but a quite simplified breakdown, nor do I want to imply you have to follow one method or another. Rather my goal is to illustrate the different approaches so you can make up your own mind, mix them, or completely ignore them altogether.
Another caveat before we begin: there’s a tendency now among certain sewists to claim some particular technique or method as the “hallmark of xyz”, which automatically makes all the garments not using said techniques subpar. I firmly disagree with such statements; the hallmark of a good coat is not the amount of canvassing, but how it fits and how it makes you feel.
Types of canvas
Traditionally, different types of canvas are used for different things. Here are some examples:
- Collar (French) canvas: this type of interlining, made of linen, is thick and sturdy, and it has to be cut on the bias. It is typically used to interface collars, giving them a good curve.
- Body canvas: made in wool, this is quite pliable and takes the roll well. It’s used in the body of the coat – go figure – and the lapels.
- Horsehair: made of wool and horse mane hair, this is prickly so it needs to be lined with domette or flannel on the side which will end up close to the body. It is stiff, giving shape to areas such as the chest and the shoulder line.
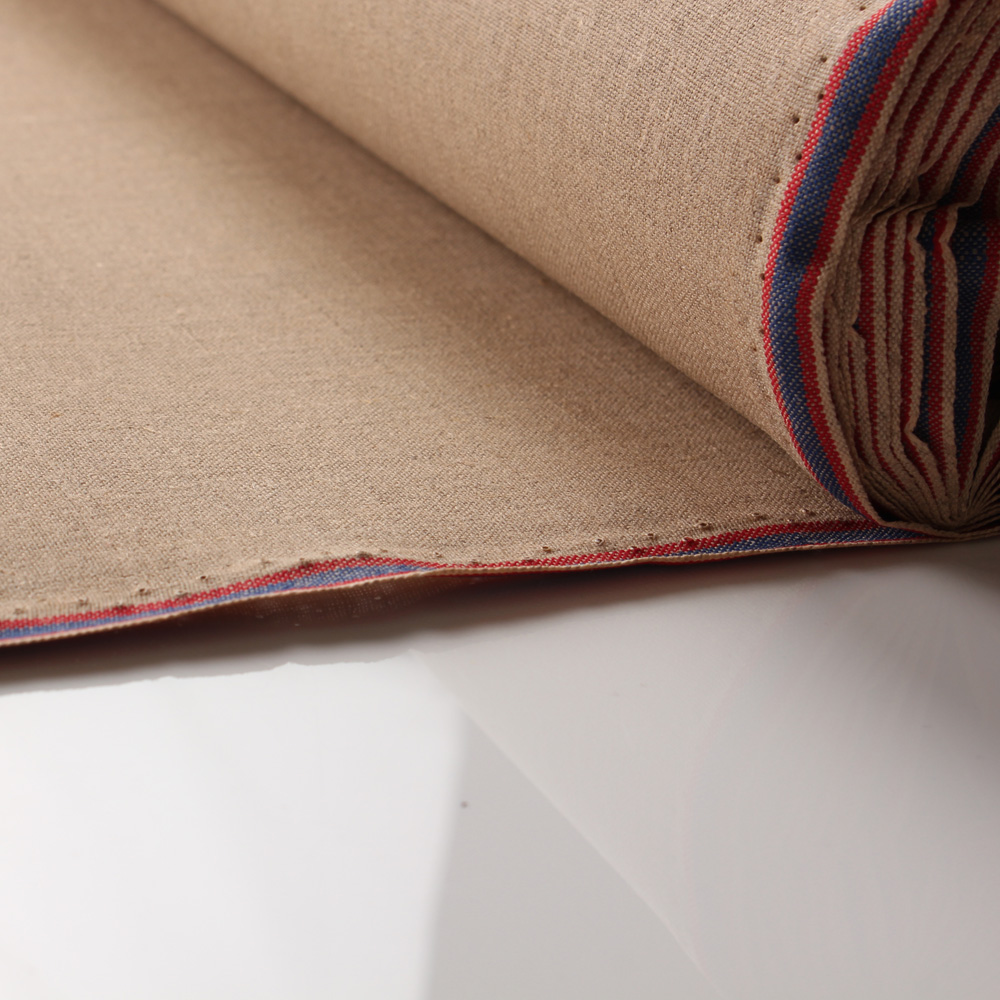
Collar canvas 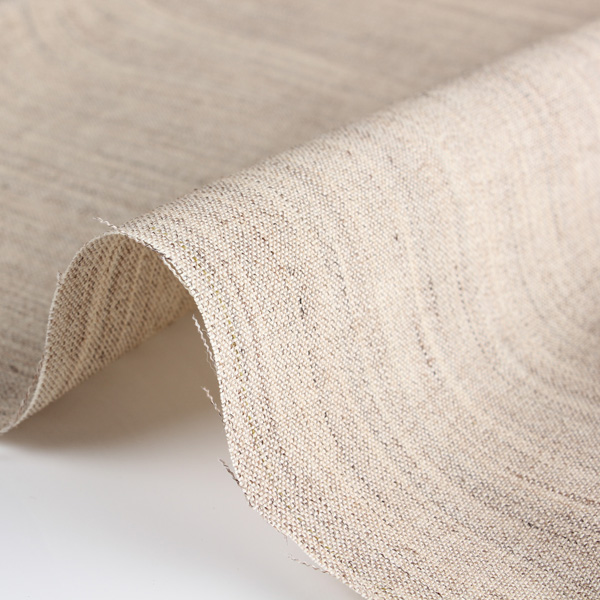
Wool canvas, in this case in a summer weight 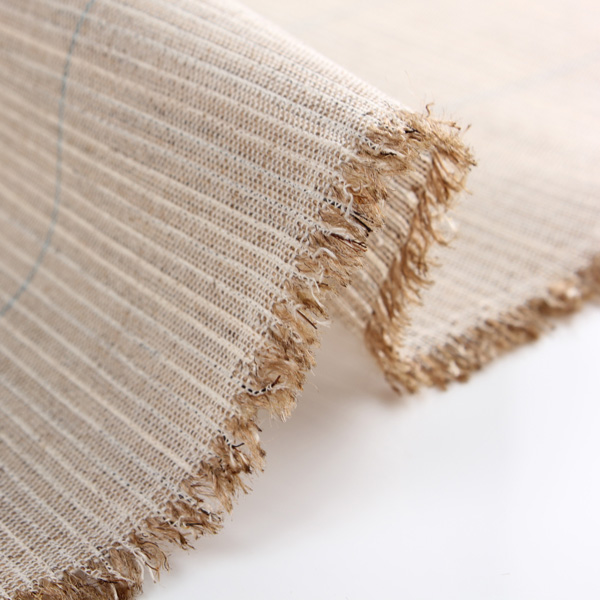
Horsehair: note the little hair poking out
How do I even canvas?
Let me get this straight: canvassing is a pain. Canvas needs to be prepared beforehand, by immersing it in water and letting it dry rolled up in a towel, or at least steam shrunk. Then you need to cut it, and then there’s the padstitiching…no wonder fusing is a thing. To illustrate the different canvassing styles, here are my trusty illustrations. These are very simplified, and please do close your darts before starting (I left them open in the illustrations for ease).
The British way
Or what I call, the canvas that stands by itself. Popularized by some Savile Row tailors, this method involves multiple layers of canvassing, to achieve a look not unlike armor made suit. I personally would never advise anyone living in a country where temperatures are above 25 C. It does make great winter coats though! As in everything, there’s a space for everything in tailoring.
It is very common to buy ready made canvas (the whole shebang), in standard sizes, like in the picture below. I prefer to make everything myself, but keep in mind this as an option. They are very convenient especially when one is learning and experimenting.
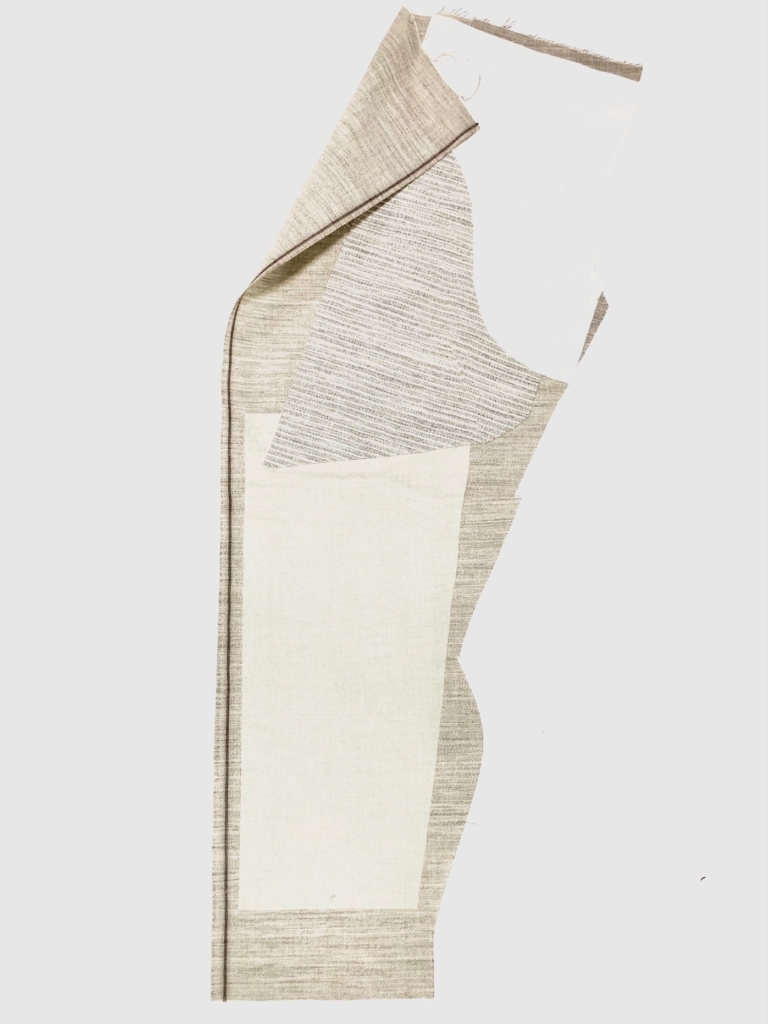
First, you need to cut your body canvas, using the front jacket pattern piece as a guide. On top of that you place the chest piece, made of horsehair and domette/flannel (horsehair against the body canvas, and domette on top of that) and bast them together.

Be careful with these bast lines, as they are going to guide you in the padstitching: in fact, you are going to pad stitch on the “towards the outside” side.

Now, construct the jacket front + side (if your jacket has a three-piece construction) and place the body canvas + chestpiece unit on it.

And padstitch the lapels. I like to tape the lapel roll before I padstitch the area, some prefer to do the opposite. I will show a detailed pad stitching tutorial later, so watch this space!

At this point you would ideally like to trim the seaming allowance of the body canvas – save for the armhole – and tape the edges. I believe taping is the singularly most important part of coat making: regardless of whether you are going to canvas or not, you do want to tape your edges, especially on the lapel, to achieve a crisp look.
The half canvas way
Another option, which is my personal favorite due to its versatility and ease of making, is the half canvas method. I believe this method is also used in Neapolitan tailoring by and large (sometimes even omitting most of the canvas! Imagine that).

Anyhow, once you have taken your fusible and your canvas, you procede as above with the construction.

Basting fusible to the main fabric is not strictly necessary, but I do it out of habit and also because I have the feeling that less shifting is achieved this way. It also helps function as markings, for example at the waist.
Another option for the half canvas, which is in my opinion ideal for unlined jackets (so my forte) is as follows. In this illustration I am omitting the chest piece, which you can of course add.

As you can see, the body canvas ends up being concealed under the front facing (here not shown). I generally lightly secure the facing to the front darts, side seam, and body canvas, to prevent it from shifting.
In the next post we will discuss the fully fused method as well as some takeaways.
Cheers!
E

[…] For the intro to canvassing, complete with an outline of the different canvassing styles, click here. […]
LikeLike
[…] This is part 2 of Canvassing 201. For part 1, click here. For Canvassing 101, click here. […]
LikeLike
[…] Previous Post Canvassing 101Next Post Canvassing 201: assembling the canvas and jacket front […]
LikeLike